Thursday, 1 May 2025

Circus Horse


Whenever we have had themes before it has taken more than a year for mine to come up so when I chose 'circus' and it was the first be to be drawn (by Barbara) I was shocked. I had to wait for the SAHRR to finish before I had time to start and that gave me time for a million ideas. 

But, in the end, I decided to go with a true story. 

My childhood home was on the bank of a river and on the other side of the river were water meadows. Mostly, in the summer, they were grazed by beautiful black and white cows and sometimes, in the winter, they flooded and we had to walk round the road way to get to school. 

But once a year the circus came.

The circus people unlocked the big metal gate at the timber yard entrance and drove in with their trucks and trailers and caravans and tents and for a glorious week the world was giddy rush of colour and music. My Dad let them hook up their generators to our electric and they gave us free tickets to the greatest show in Church Meadows.

It began with the elephants coming for their morning bath in the river and ended with us children lying in bed, listening for the strange roars and wondering if the lions would get out of their caged trailers and eat us in our sleep!

Funnily enough, I have clearer memories of circus 'village' that sprung up out of nowhere and vanished like magic than the actual shows we watched inside the big top and my quilt is based on something that happened outside the tent.

One day, our elderly neighbours came back from the town with their shopping and said, we would never guess what they had just seen in the field. And of course we tried to guess- lions, monkeys, clowns, tight rope walkers, trapeze artists...But no.

"We saw them painting their horse!" 

"What colour?"

"It was a white horse and they were painting black spots on it! It made us chuckle".


I have taken a little license in the blue spots and I doubt the person painting was dressed as a clown...

I will post more about the making of this quilt on Rainbow Hare but I'll wait until tomorrow or Saturday because tomorrow I am (by complete coincidence) going to the circus with my little granddaughters and, perhaps I'll include some photos.

In the meantime, I'm really looking forward to seeing how everyone else has interpreted this theme :)


Wednesday, 30 April 2025

A Costume for a Performer

 As I was pondering what to do for this theme, I remembered an article I had read long ago, about making costumes for Cirque de Soleil.  The budget was not large, so the costumer made striking effects from unusual materials, including shower curtains!

I decided to make a simple tutu from the linens and laces I painted last year, with a purple batik for the background.  

A costume for a circus performer.

To add some sparkle, I used metallic thread with some decorative stitches, on both the background and on the petals of the skirt.

Some of the metallic thread.


I may add more embellishment, thread sketching, and beading in the future. I enjoyed using those painted linens, and playing with fancy thread!

(I can't get Blogger to let me schedule this post so the date will be the date I wrote it, not the proper reveal day of May 1.  :( )

Tuesday, 4 February 2025

New Theme

New Theme

A big thank you to everyone who linked up 'Mosaic' quilts. It was, as always, a wonderful collection. I'm always impressed at how all the quilts are so different, given that we work from the same prompt. 

We have a whole new slate of prompts to start off the new year:

1. Favorite Book

2. Effervescent

3. Sashiko

4. Circus

5. Motion

And the random generator wheel has chosen...


So our new theme is 'Circus'.

The Reveal Day will be May 1st at 10.00 GMT and, in the meantime, you are of course welcome to post anything related to this theme or art quilting in general here on The Endeavourers.

Happy Sewing!

Saturday, 1 February 2025

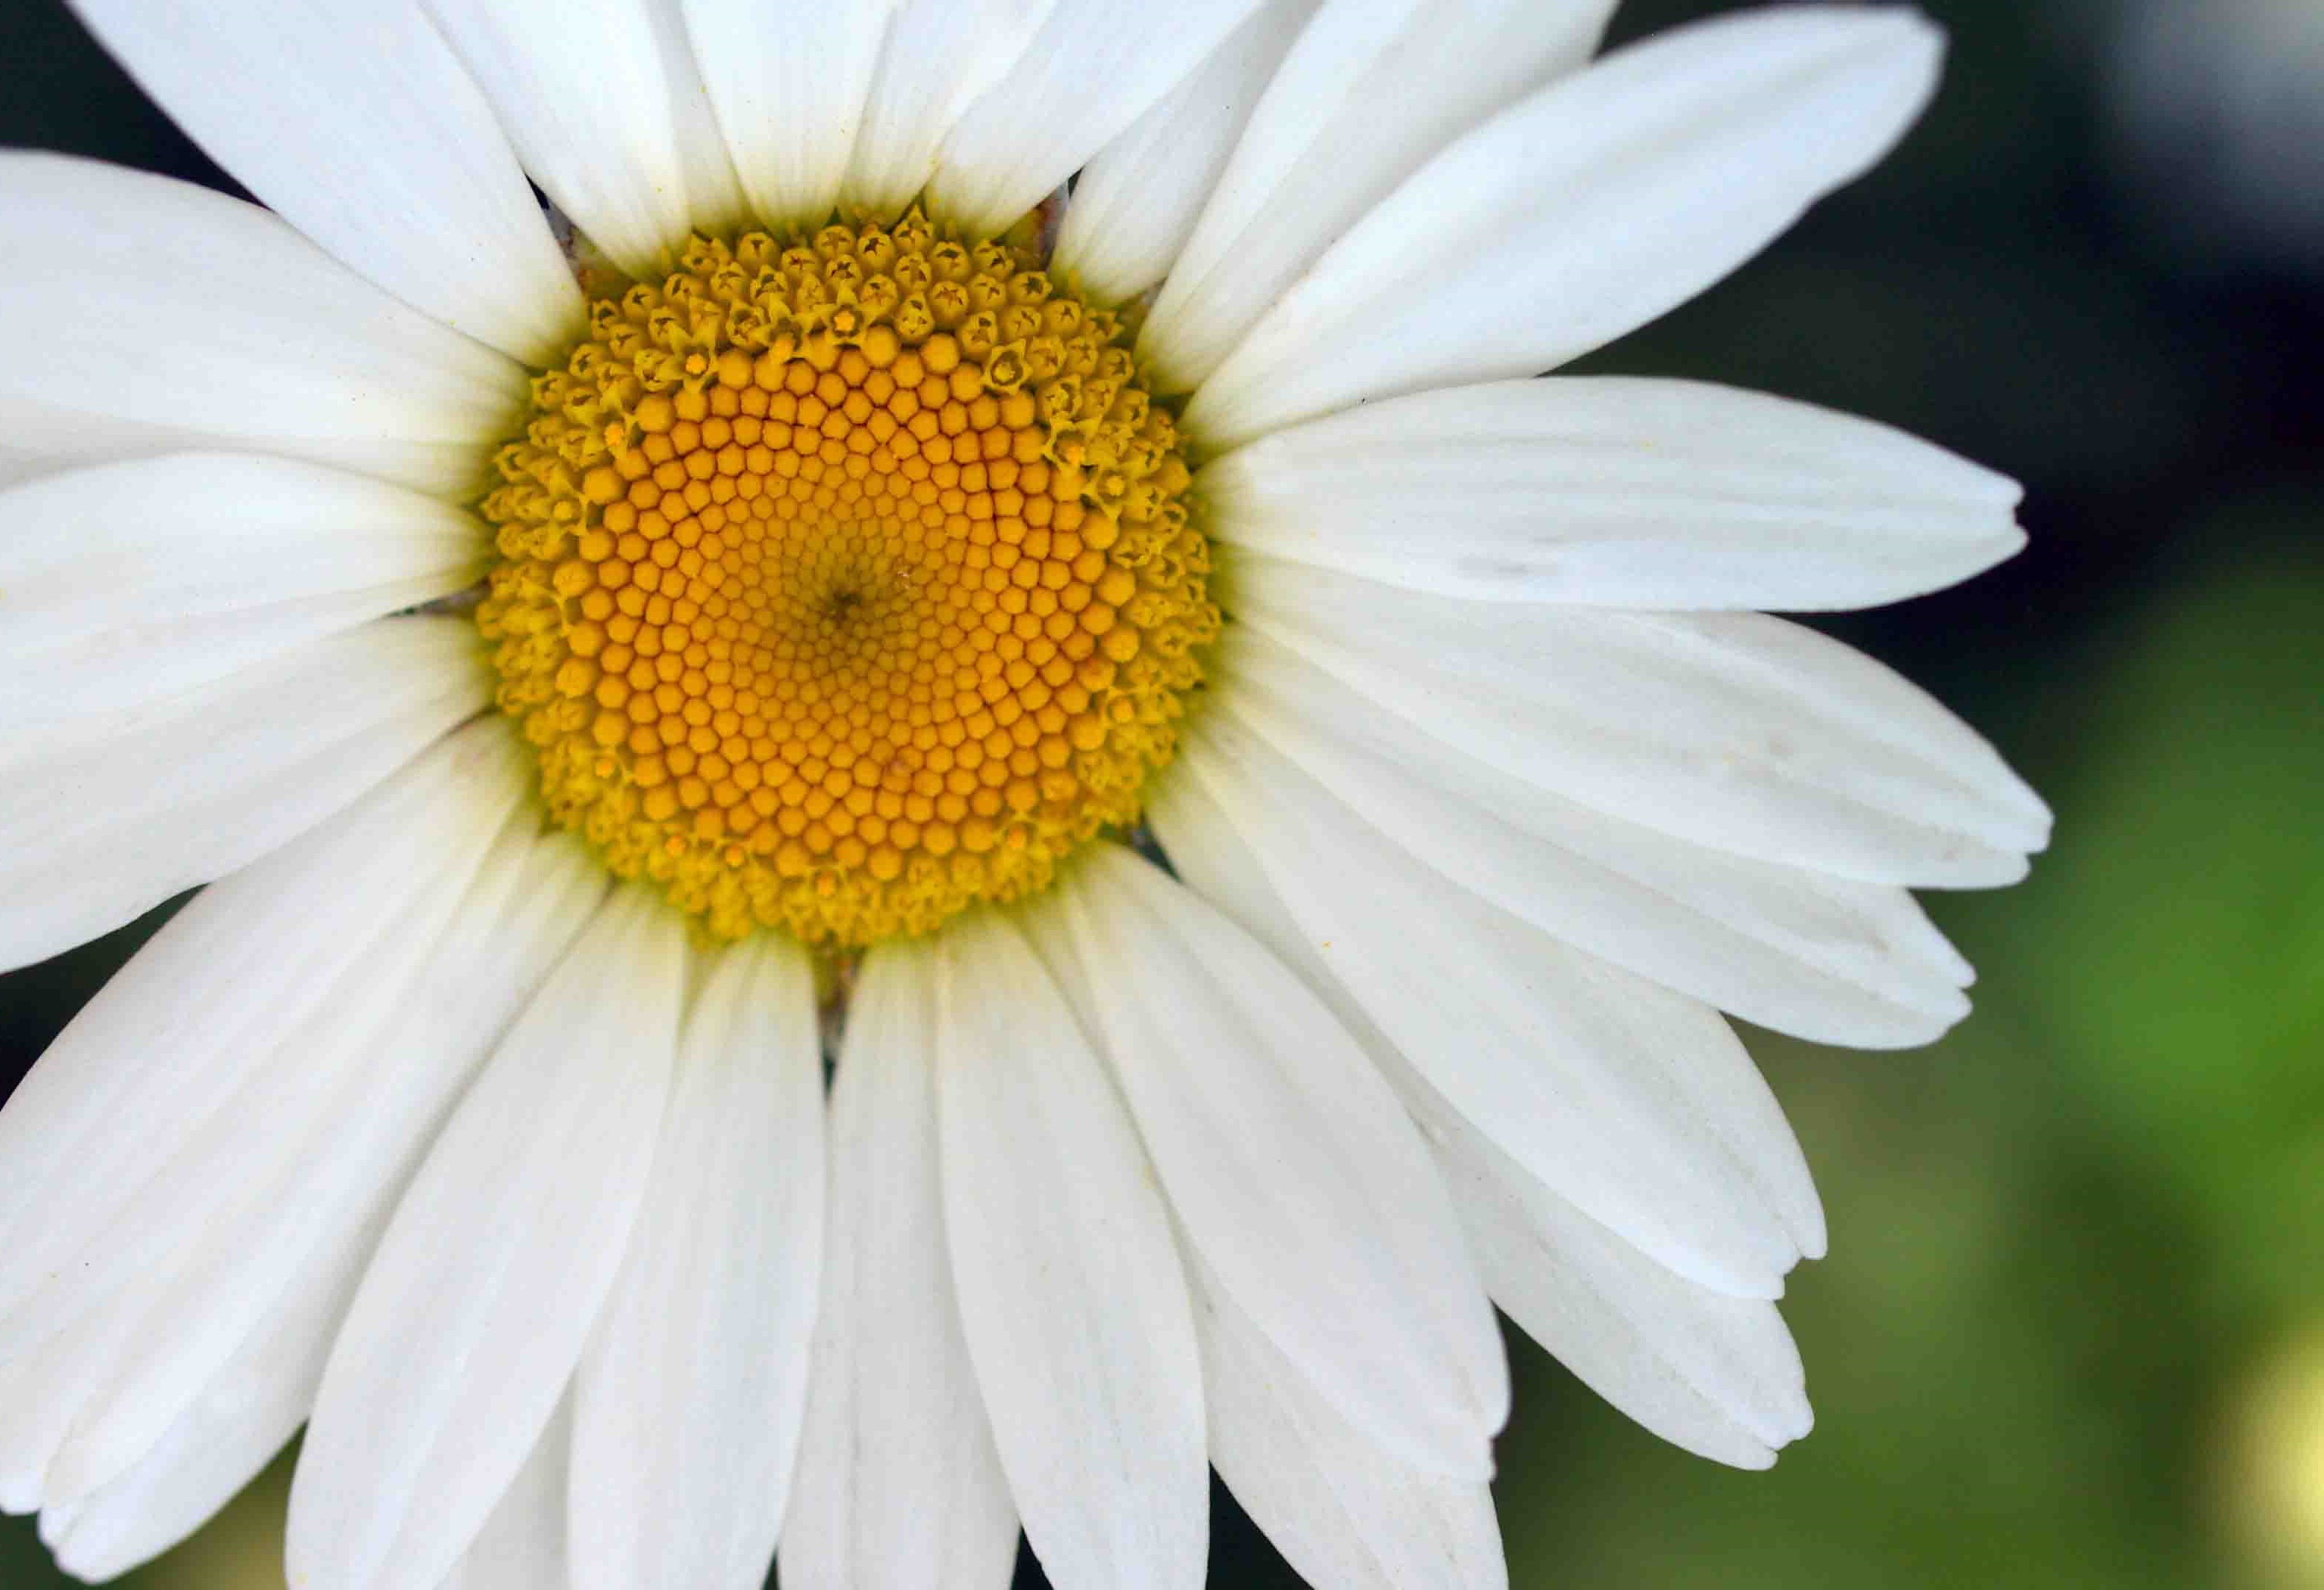
Daisy Mosaic

For this project, I wanted to try a technique from this book by Timna Tarr. She has a page on Facebook, and her work with this technique is simply amazing. Her book is excellent, with excellent instructions.


At the beginning, I had a couple of false starts, both in the image I wanted to use, and then with the fabrics I wanted to use. In the end, I settled on this image.


The first step is to draw diagonal grid lines over the image. They can be of any size, but I was going by the book. Mine were 2 inches.


When it was all done, it looked something like this.


The next step is to number each square. That way, if your pieces get dropped or mixed up somehow, they're easier to put back in order.


As I went, I found that some areas were difficult to see with just a black sharpie. I went in search of one with white ink.


It's actually a "paint" pen. I was disappointed that it wouldn't work to use directly on fabric. It simply absorbs into the fabric and can't be seen. For my purposes, though, it worked great!


The next step was to cut two inch squares from freezer paper.


Those were numbered and then ironed to the backs of fabrics as I went.


For this project, I set up a foam core board I could use as a sort of design wall.


I could pin the pieces directly to the board.


And then, I just kept going.


I've only ever done machine applique, and so this method was new to me. I painted the edges of the fabric with starch and then folded them over the cut template.


The book suggested marking the colors before cutting the pieces in order to keep straight which color went where.


Soon you'll see that neither of these fabrics was used in my finished piece, but this is the only photo documentation I have of my process. Originally, I thought I'd do the flower petals in pink and the background in aqua, but then I changed my mind and went back to the original.


And while this method is often used as "needle turn applique," I was still stitching the edges by machine.


And I kept going with the pink for a while...


But eventually switched back to the original white color. It helped me to pin the image to the white board and pin directly over the top of it.


When it was all finished, it looked like this.


Before trimming, I sandwiched it for quilting. My first step was to outline all the petals. This was my one worry regardless of the color fabric I used. Would there be enough contrast for the petals to stand out? Since there wasn't, I decided to outline them in black.


And then I did some pebbling in the flower center.


When the quilting was finished, I trimmed off the triangular edges


And added a binding.


Here's how it looks from the back.


So I can't say I'm completely satisfied with how this turned out. Probably a different image would have worked better. Nevertheless, I enjoyed the process, and I'd try this again in the future if it seemed like the best way to complete a project. I hope you like my quilt!

Mosaic: Vintage Brooch

For this theme of Mosaic, I was not looking forward to adding fusible web to small pieces of fabric and then trying to manipulate them into place.  Fortunately I found the work of Colleen Ansbaugh!  In an article in the Fall 2021 issue of Quilting Arts, she recommended putting down a large area of fusible web as a background, and then adding the small pieces of fabric on top.  And then once they were all fused in place, adding a layer of netting to hold all the edges down through the stresses of stitching.

So that is the technique I followed, to recreate the look of this vintage brooch on a larger scale.


I cheated a little bit by "binding" it with a large wooden hoop. :)

This is not one of my favorites.  When I look at the individual pieces of each flower, I feel like I copied the original satisfactorily, but the overall effect reminds me of a red crab and two eyeballs.  Even my phone suggested the "food" filter when I took the photo.  And I don't think I will be doing this technique again -- I do not enjoy working with tiny pieces.  But as always, I enjoyed the process and stretching my skills!

If you would like to see more of the steps of creating this piece, you can visit my blog Deep in the Heart of Textiles. 


Mosaic Underfoot

 Well, if that title doesn't pique your curiosity, right? As usual, my idea for this theme prompt is not the idea I ended up using. I had a little fun with this prompt, using inspiration from a few artists I follow on social media. 

Are you familiar with pothole art? A Google search will bring up all kinds of examples. I follow a couple of artists on Instagram, and I think the idea of taking something unsightly like a pothole and making it a piece of art to see while strolling along is a fun idea. So I decided to take my mosaic underfoot and try some pothole art with fabric. 

There's so much about this piece that I would change, if I were to do it again, but let's ignore that and I'll tell you how I constructed it. The mosaic strips were strips made in an online improv workshop that had been sitting and waiting to be used. I freehand cut a shape from the sewn strips and then added the black border. The tricky part was adding the cracks and the sidewalk, or background, to the piece. That took a little thinking, but I made it work. The finished quilt is 20 x 22 inches. 

I was a little perplexed about how to quilt it, so I actually made a little sample piece to mess around with. 


This little sample is about 9" x 13". I used it to try out quilting designs in the mosaic and also to come up with the sidewalk design. I also messed around with thread colors for the sidewalk. In the end, I went with a rectangular sidewalk design, and used a brown thread to give it more of a dirty street look. I'm not sure I achieved that, and am still pondering what I would do differently next time (if there is one!). 


The quilting in the mosaic is just random lines throughout the design. I used a light orange thread, so it blended in well with the mosaic. 


I'll likely share more information about this quilt on my blog, if you are interested. I'm not sure this resembles pothole art, but I think it met the mosaic challenge. 

What a fun year of challenges in 2024! Thanks to Janine and Barbara for keeping the group moving forward! 

Wendy 


After some false starts, my mosaic quilt was inspired by this post that I came across on X. I haven't been able to share it properly here so here is a link and a screenshot.


Doesn't that remind you of little Fiona?


This photo shows the steps I used to make the quilt and there is a bit more detail on my blog but I think we can safely say that mosaic quilt making is not my forte!


Now, I'm looking forward to seeing everyone else's mosaics :)

Ostia Antica

 When this theme was suggested I bought myself a copy of "Stitched Photo Mosaic Quilting" by Timna Tarr. I found a video of our granddaughter that was going to provide a still photo for the basis of my first mosaic quilting. Then I promptly dithered over the whole process of translating the video into a still photo, (finally achieved!) and working out how and where to get it printed at the optimum size without bankrupting myself in the process (!). 

Whilst this thought process was still rattling about in my brain, I came across some photos on Social Media of the Mosaic of the Provinces at Ostia Antica, an ancient Roman city and the seaport of Ancient Rome. As you can tell from the title of this post the Photo Mosaic quilt idea was swiftly jettisoned, to be returned to later :)

Being inspired by the photos to delve further into the history and nature of the Mosaics at Ostia Antica I discovered a line drawing from 1912 of the full mosaic, which you can see here The drawing just looked like a quilt pattern to me, so I decided to base my quilt for this quarter's theme around one of the mosaic squares from the drawing of the original.


The original mosaics were made in black and white tiles and I did consider making a monochrome quilt, but in the end I decided that this quilt was inspired by not a copy so went with fabrics that looked liked tiling instead.

The cream fabric has a tone on tone check on it which you can't really see in the photo and the pink fabric reminded me of Venice so was a shoo-in for the central square :)

I found a length of this lovely fabric in my stash and thought it would be ideal for the backing fabric.

The blocks were fairly straightforward to put together. The cream squares within the purple strips were 6.5" squares, the purple strips were 1.5" wide, the pink squares were 2.5" and the cream borders were 2.5" strips too.

I wanted the quilting of the piece to reflect the Roman part of the inspiration for the quilt so I quilted straight lines in the purple strips - Roman roads, even in the hilly North of England and Southern Scotland were straight.


 My centre block was the ideal place for some cross-hatch quilting that resembles rows of the Roman Numeral - X :)


The original Mosaic of the Provinces has four fish swimming at the centre to represent the port, so I decided to quilt the open cream blocks with a fish. I ordered some dolphin templates to use for the blocks but they did not arrive in time, so I hunted through my many craft magazines and found this needlelace template to use instead.

The circle quilting in the remaining blocks is a nod to the shields portrayed in several of the other sections of the Mosaic. Some wavy lines to represent the sea were added to the border strips.


I used a New to Me binding method, using the backing fabric as the binding and finished it off with a zig-zag (now known as Roman Numeral V!) stitch to attach the binding to the front of the quilt:)

 I was tempted to call this quilt "A port in the storm" as I was working on it (before the power went out!) whilst Storm Eowyn was flinging waves up to our door and rattling our windows till we were sure they were going to fall in! Thankfully, the sea eventually calmed down, the windows withstood the ferocious winds and the power came back so it was all fine in the end.

Once again, I have enjoyed meeting this latest Endeavourer Challenge and look forward to seeing the wonderful ways that my fellow Endeavourers have interpreted the theme!


Mosaics: Water Lilies


 At first I had many ideas for "mosaics". But none of them worked. I almost decided to skip this posting. Then an idea came to me:
Not thinking this is really a mosaic. Decided that the biological definition applied: an individual (especially an animal) composed of cells of two genetically different types.

The "flower" in yellow orange is actually a Dorset button that I made specially for this. 


Thursday, 2 January 2025

Themes for the Coming Year?

Just posting and wondering about the future. There are no more themes. Are we continuing into the next year? I hope so. And what about themes? Should we be suggesting new ones? If everyone's on board, I'll start:

"Favorite Book"