Saturday 8 December 2018

Gathering Materials

I have collected what I think will be enough supplies and materials for my texture quilt project. I've looked on Pinterest (never found the bottom of that rabbit hole, thank goodness). I watched a few preview videos about classes that would teach me how to add texture to quilts (I got the jest of it in the previews). Now, what's the plan? Hmmmm, only time will tell. On my carpet, sets my harvest!

How goes it with the other members? Merry Christmas, Happy New Year.


Friday 9 November 2018

New Member

A new member joins The Endeavourers.

You can find out more about Wendy on her blog here and on Instagram.

Welcome, Wendy!

Wednesday 7 November 2018

TEXTURE IDEAS


PINTERST is a wonderful source.  I can’t get out much to take photos, so I just went to Pinterest and typed in Texures. It’s unbelievable, an endless source of them!  I’m really going to explore new techniques. Take a look for yourselves.

New Theme Announcement

That was a splendid reveal - congratulations everyone!

And now for the new theme.  We still have the following in the hat:
  1. the sea
  2. a walk in the park
  3. texture
  4. memories
  5. a quilt inspired by a newspaper headline
  6. emotions feelings
  7. opposites attract
  8. colour theory
  9. dreams
  10. wishes
  11. a scene from a book
  12. raindrops keep falling on my head
and Mr Random Number Generator has chosen:

which is 'texture'.  That certainly suggests any number of possibilities so it will be exciting to see the results at the next reveal on 1 February!

A little late - apologies!

Improv

I’m afraid I struggled this time! I decided to try improv circles and found it a bit too tricky!

The Flashing Scissors.blogspot.co.uk

You can read more about my Portrait of a Polka Dot Lady on my blog HERE.

I am taking this opportunity to let you know I am stepping out of the group. I have enjoyed participating, but have found it hard to make the deadlines. For the last few months I have had problems commenting on Blogger blogs, and investigating why this happened has eaten into valuable stitching time!

I will be popping over to visit of course! This is such an inspirational blog, and I would never have tried so many techniques if I hadn’t been a member here.

Thank you Janine and Catherine for allowing me to take part, it was a great experience!

I wish you all well and look forward to catching up on visiting everyone.


Barbara xx

Thursday 1 November 2018

Gonna Be a Little Late


Hello everyone! Maureen from https://josephinaballerina.com here. Although I have been a member of The Endeavourers since its inception, due to a series of strange circumstances I have yet to actually make a quilt. I was bound and determined to join you with a quilt this quarter. I am in the process of making one, but progress is in fits and starts due to the fact I had shoulder surgery four weeks ago and I can't really move my right arm. And I am right handed. However! Here is a sneak peak of the Improv Quilt I hope to have finished within a week.

I am so inspired by the fantastic quilts you all produce each quarter. Wow.

Smiles from New Jersey, USA,
Maureen (and JB the cat aka Josephina Ballerina)

Window

This challenge has really been exciting for me, giving me a chance to be creative with what I have on hand. I’ve used fusing for the first time rather than appliqué. All the components are from former projects. The result is Shining Vista.
The first part was an 8-inch block I made for a monthly color series done in 2016.
I never did use these blocks for a quilt, one of many UFOs. The second piece was from a set of practice blocks for fusing.
These were just bits of batik strips fused to these crazy blocks with pinked edges. The one with the yellow and purple reminded me of a sunset, but I had no plans for it. I happened to set it down on top of the purple block and…that was exciting!
So when I was looking through my UFOs I knew this was the focal point I needed. The cream fabric was handy and I had enough to use for the top and backing. By the way, I’m on a year of no fabric buying and sticking to it.
For the side strips I used a reject from a project that I abandoned. It had the gradation from dark to light, but was much wider. So I cut two strips from that and used 2-1/2 inch strips for the top and bottom borders.
I fused the top and batting, which made it nice and firm. I used HeatnBond Light fusible.
I began by quilting the purple areas and added the directional lines, then used a tight zigzag to emphasize them. Today I finished the quilting. Deadlines really help.

Improv Reveal

Improve - Fractured Minerals
I got a lot of ideas from Youtube and used some of the ideas from the Mr Domestic to start me off. The fans reminded me of agate and other minerals so I alternated some of the fans to make strips. I did cross-cut a few to make small blocks and to make the piecing simpler I kept to 3 1/2 and 4 1/2 strips and blocks

I finally ended up with this
DSCF6553DSCF6555DSCF6556
The big reveal in my case is I got stuck. Should I trim and bind? Seems too traditional for it. Maybe bag it out so there is no binding instead?  I do like the uneven edge. Or bind, keeping the wobbly edge Has anyone got the answer!!!
I was so inspired by some of the clips I saw that I have ordered Improv Patchwork: Dynamic Quilts Made with Line & Shape by Maria Shell! This theme has started me off in a new direction, although thinking about it, crazy patchwork is really improv patchwork too, so not so new afterall

Improv

'Improv' means, roughly making something using the material to hand (literally when it comes to patchwork.) But the thing about improv is that it's not really random - there's always some kind of structure.  For example in improv jazz there's an underlying chord sequence, and in improv comedy, or poetry, it makes sense (usually).

So there are generally some kind of constraints.  In quilt-making you can choose to put your own constraints on the process by choosing a limited pallet of colours for example but there other practical constraints too - like where to put seams!

I found this a fun challenge - I thought that it would be a good excuse not to overthink things, but I was wrong!

Here is my quilt, inspired by the jumble of textures in the garden where I work.  You can read more about it on my blog


Improv Challenge


Hi, this is Janine, posting on behalf of Paula for technical reasons. Please visit Paula B Quilts to see more of this lovely quilt and to read Paula's Endeavourers reveal post for this quarter :)

Just Improv


Welcome to another Endeavourers Reveal Day. Can you believe we've been going for a year now?

Of the challenges we've had so far, I found this quarter's theme - Improv - the most alarming! It wasn't really the techniques I found daunting as I've made a fairly wide variety of improv bee blocks over the years but I struggled with having no concept to work with and, being given to illustration, I decided that, this time, I would make a quilt that was NOT pictorial and did not involve any kind of story. A quilt that was just improv and nothing else.

I thought it best just to plunge in so I selected some newspaper fabric scraps and a bunch of very small solid squares. This rather limited my options but it did make randomly selecting and sewing together pieces until I'd made a block less out-of-comfort-zone than it might have been because they were always going to look ok together. Nevertheless I found myself with an ugly block, which really didn't seem to me to compensate me for the time and fabric used making it. It was only when I realised it might make a nice horse blanket that I started enjoying this little quilt so I finished up my first practice piece, happy to have accomplished it but having failed to avoid sewing up another picture...


Next I thought I'd try some curves and, almost before I knew it, I had fish!


Or perhaps vases...I liked the fish/vase idea so much I embarked on a block with an improv background (hard to see in the photo but a variety of of tone on tone whites and creams).


And I made some improv-ish flowers made from slashing a pile of roughly 5" squares into to wedges and sewing them together.


And this was actually my favourite improv experiment but I found the fish too curvy for improv curves so I made a fish template and I drew round a circular coaster for the flower applique so I ruled it out for the challenge and continued with some blocks that were not at all improv...


For my third attempt, I selected a piece of background I've had for years and some solid scraps and decided just to go round and round with improv curves.


To start with, I envisaged a spiral but once I'd done the centre I couldn't see how to accomplish that and I didn't want a ring so I made nesting 'C' shapes instead...


 ...and just went round and round until I had too little background fabric for another round. To finish it off, I used leftovers to make a row of improv 'squares' and then squared up the whole thing. I bagged this quilt as I hadn't sufficient fabric for binding and I didn't want to introduce more of the colours.


Finally, I quilted by stitching in the ditch and adding lines of machine and hand stitching.


I finished this up early in the quarter and I planned to try out some more improv and, perhaps, make a better quilt but, sadly, I found myself without a sewing machine for a time so I am thinking of this as third time lucky!

I'm very much looking forward to seeing what everyone has made for this very tricky theme :)

Improv - how hard can it be?

Improv is a challenge I was looking forward to and expecting to be difficult at the same time. When it comes to quilting, I like to design. I love brainstorming, gathering inspiration, seeing what catches my eye, questioning what bits I like, what I don't and developing a design I'd like to make. Curiosity tends to be my driver. I wonder what that would look like in low volumes, or how would that work if I made it really big? Or both.


I tend to gather like a magpie on the computer, words in a notebook and have some ideas in the back of my mind, not yet made, that pop up when I'm not looking, like a comfortable habit that plays out subconsciously. Improv on the other hand could be considered the opposite of all that. Oxford English Dictionary has two things to define Improvise; the first being: "creating spontaneously without preparation".

Is there really such a thing as without preparation though? Could it mean the absence of a pattern? Definitely. Absence of a sketch? Not sure. Absence of an idea? Don't think so. When does an idea cross over from inspiration to preparation? No clue!

My first thought that popped into my brain was a peacock with an improv made tail. Wonky freeform curves that would be glorious in their vibrancy of colours - teal, gold, green and blues. My minds image had it looking like this:

Large and fabulous in a bed sized quilt. (Bigger curves are easier after all!) The tail being the improv part and the birds head not so much so it's at least recognisable as a peacock! As in the last few challenges, I've discovered my first idea is grand, big and involved and time-consuming and something I really want to make. With 3 months to complete though completely unachievable. There is the day job, committee work and family to look after too!


So onto plan B. Oxford English second thing about improvising is: "Produce or make (something) from whatever is available", McGyver style. Now I have a large stash so limiting myself from diving in could be a challenge. Luckily enough, our branch of the Irish Patchwork Society, had booked Catherine Lawes (a UK based Textile artist) to give a workshop, on layered landscapes, using any fabric but quilting cottons. That I thought could be fun and not bringing any non-cotton fabric with me at all, I had to use what was available in the shared pile.


I was inspired by Kaja@ Sew Slowly who is an improv quilter I admire. She had made a lighthouse quilt and it was really cool so I thought a lighthouse like the Fastnet Rock would be something I'd like to hang on the wall. It is a lonely lighthouse built on a rock off the coast of Cork that people like to race around in sailboats and it can be really dangerous especially in our wild, windy, winter weather. So I made a dark themed lighthouse out of all sorts of materials, it is handstitched and glued through three layers so still a quilt.

The thing with an improv piece is how to know when it's finished? I've added machine quilting in the waves and the outline of the lighthouse. I'm thinking about adding in some bit of a sunset with thread. The nice thing about a piece like this is if I want to do a bit more I can just take it out of the frame, remove the mat and take it back to the machine.


So have I come to a conclusion on improv, not really but I have discovered these challenges are stretching my brain and giving me plenty of ideas for quilts to come!

Tucked Away

I must confess that my heart sank when I read that Improv was this quarter's theme for the Group, I have struggled with Improv blocks in the past so knew that it wasn't going to be a straightforward process to create a piece for the theme.

This piece, which I have called Tucked Away, is my response to the theme.

I chose to take a technique, Chenille quilting, and use random stitching to reflect the Improv theme. I have detailed the differences between the blocks in my post here as I wanted to mention other aspects of the hanging in this post for the Endeavourers.

Whenever I need to come up with a project to fit a theme I always turn to photographs for my inspiration and this challenge was no exception. The photograph above was taken on our visit to the Benmore Botanic Garden a few months ago when I was on the lookout for interesting textures for an upcoming competition in the Camera club. The fungi are fabulous but the fairy door beneath was the icing on the cake :)

I toyed with all sorts of ideas - trapunto and matchstick quilting to name but two to emulate the tree bark for my blocks, but wasn't really convinced until I reread Layered Cloth: the art of fabric manipulation by Ann Small and realised that Chenille was the technique that I needed.


Using different widths of random stitching and different directions for the stitching I was able to produce a credible tree background.

I wanted to use Suffolk Puffs (yo-yo's) for the Fungi but realised that the traditional round shape wouldn't work for the frilly half-moon shapes that I needed, so I cast around in my sewing room for inspiration.


The oval lid from a long ago eaten box of truffles proved the ideal template!

Stitched with a running stitch around and padded with toy stuffing when the running stitch was gathered up they made ideal fungi for my tree house tree.

As you can see :)

Two pieces of pink wool fabric stitched together with a small piece of thick wadding in between and a button for the door knob made the perfect Fairy Door.


To complete the embellishment I added lengths of machine wrapped cord for tree tendrils and a few beads nestled in amongst the frayed edges.

As you can probably tell I had great fun with this project and I am loving the amazing directions that this group is pushing me into :)

Looking forward to seeing how everyone else has met this challenge.

Improv Patchwork

Untitled


 I love the look of large patchwork quilts. I find them very cozy and homey. However, this is only my second one. I made my first one a long time ago when I first stated quilting. And never tried again. Coloring outside the lines sort of speak can be challenging. When'd I had trained my brain to work with a pattern or template; conceptualizing a quilt without a pattern to start with feels a bit daunting. But this challenge was the perfect opportunity to give it another try. I had some scraps I wanted to use up and seed where it would lead me. The process was so liberating. I loved letting fabric dictate where this design was going to take me. And the best part I ended up with a large quilt perfect for this  chilly autumn weather. You can see more pics on my blog (sorry I got ahead o myself and blog about it about two weeks ago, I was too excited about my new finish).

XO
Martha

Improvisational Doesn't Necessarily Mean Quick


I love to work improvisationally, so I thought this theme would be easy for me.
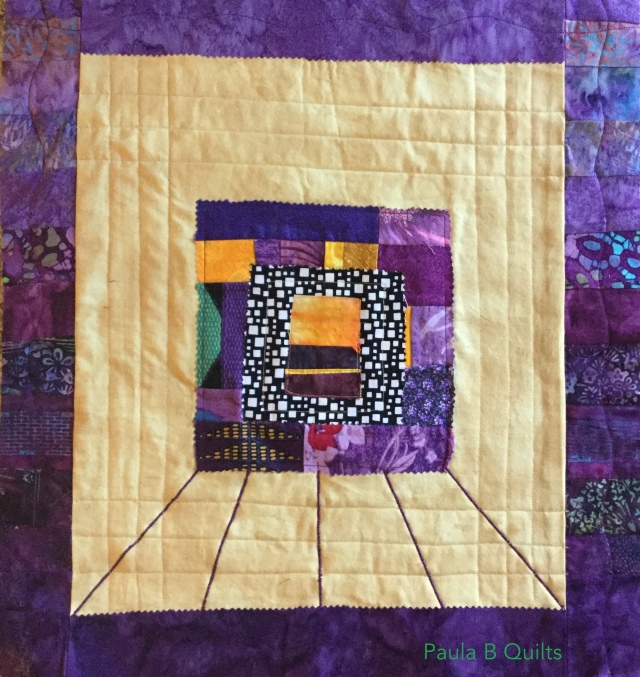
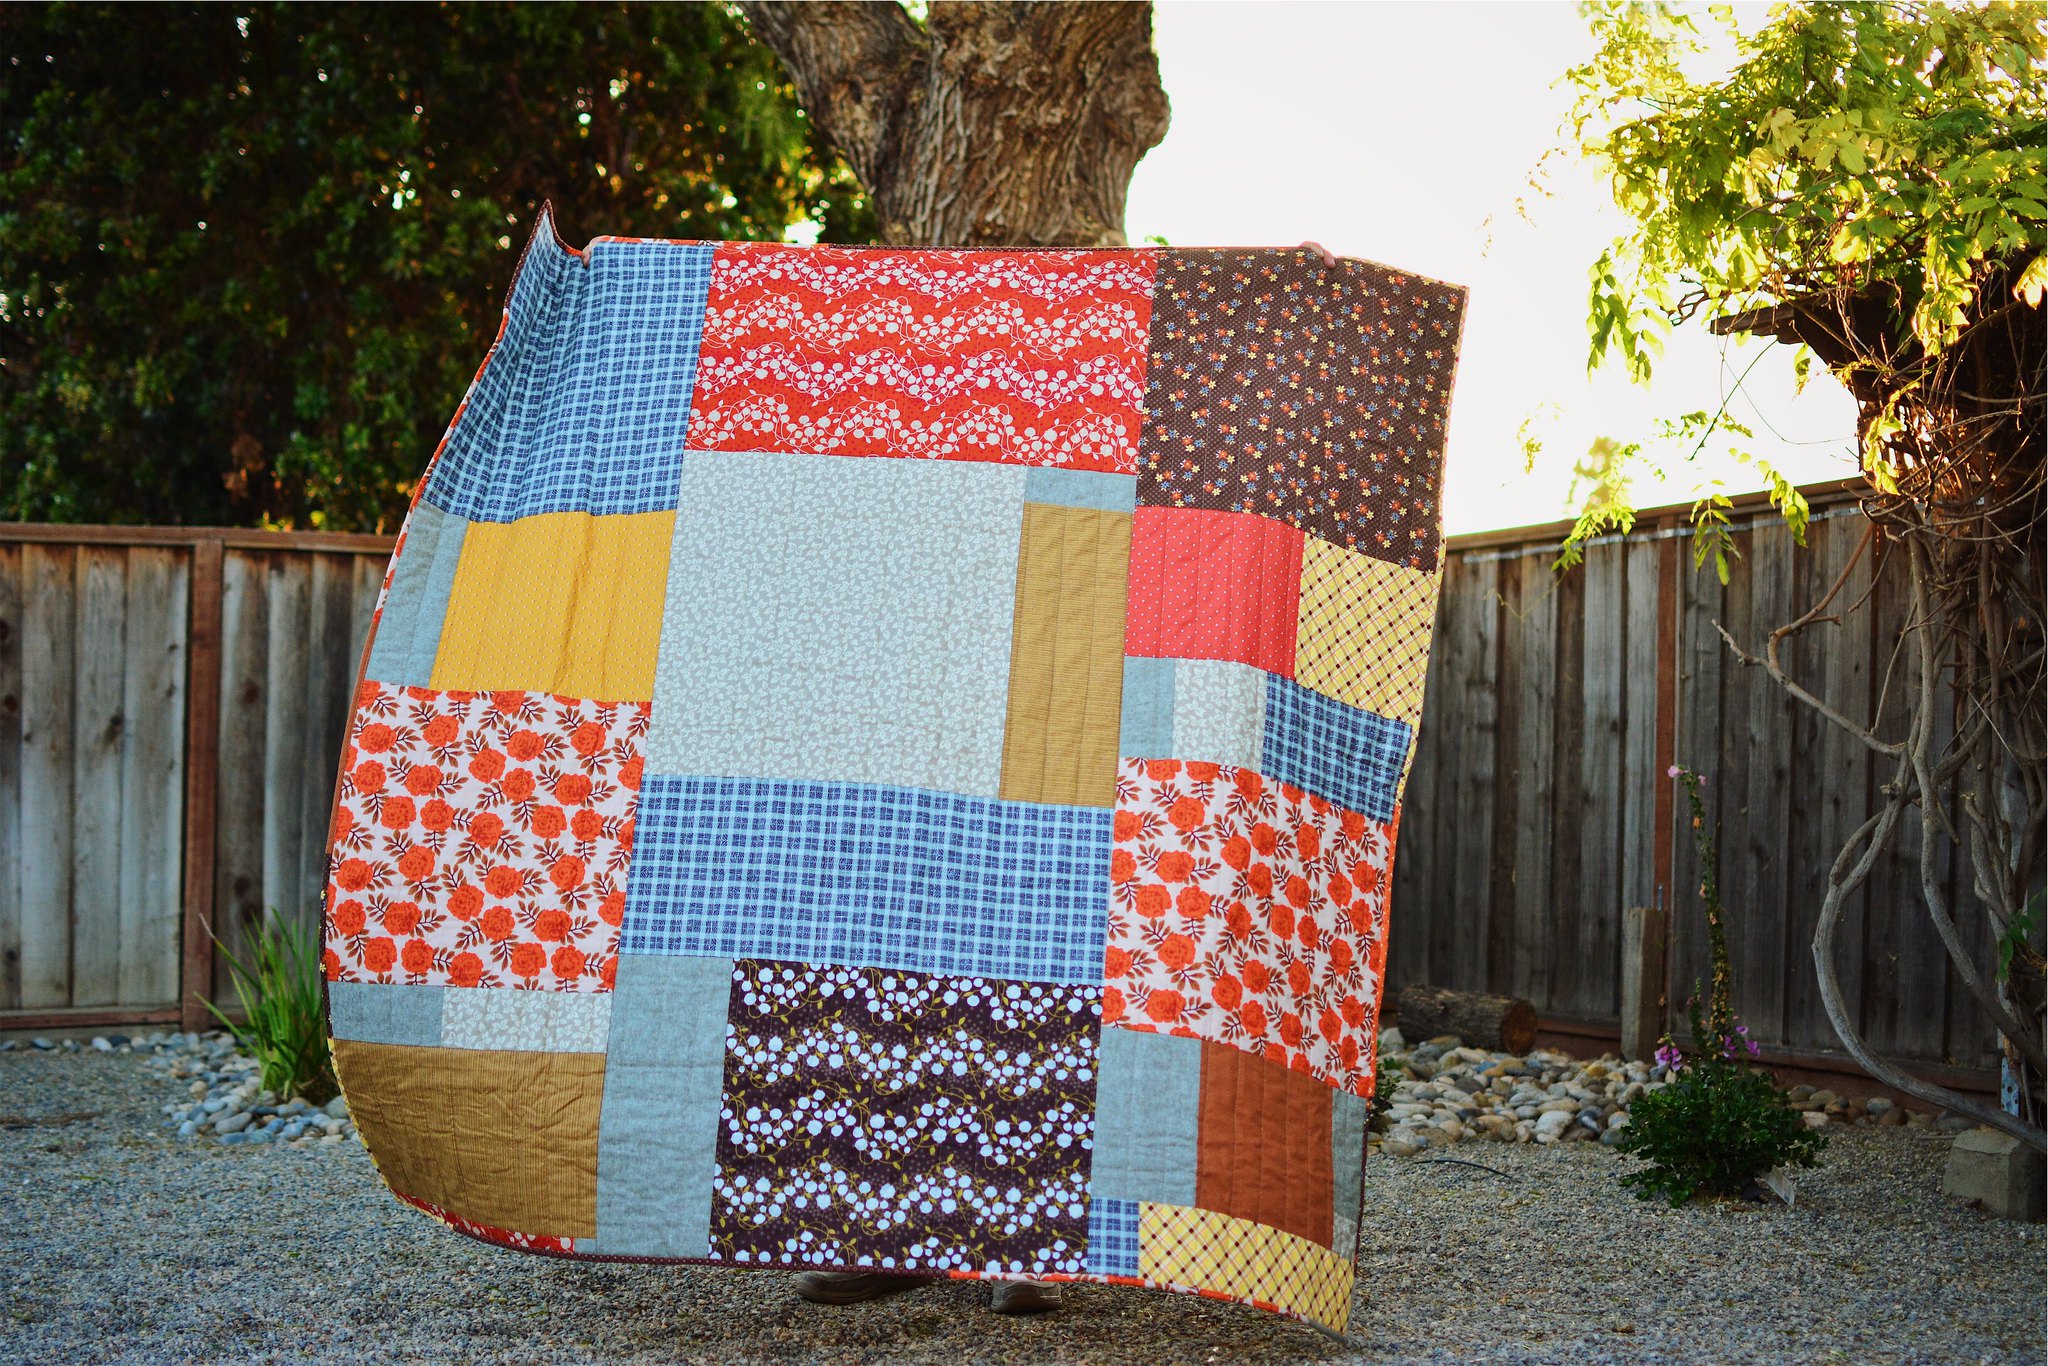
One of my favorite quilts, from 2011.

I was determined to do something that would stretch my abilities.  And I even had a great idea as soon as the theme was announced!  But life intervened and I couldn't get to it.  That one is still in my mind to be completed some other time.  But to make this deadline, I was going to have to do a smaller project, and I felt like doing something floral.

My initial idea was to have a focal point of densely stitched flowers in the center, fading out to a suggestion of flowers and leaves in the middle background, fading out even more to flowers and leaves stitched white-on-white in the distant background, framed by cutwork spirals. (Wow, words make it sound really complicated.)

An influence for this idea was Ana Buzzalino's work, especially the pieces where she does one small area in color, and then quilts in white all around it.  Another influence was a quilt I saw in a book somewhere of a tree with huge cutout areas, and beaded leaves hanging in the negative spaces.  (I could not find that image anywhere; if you know the one I am talking about, please let me know!)

And as often happens, once this idea occurred to me, I started seeing versions of it everywhere.  I especially liked this one from House Beautiful magazine, showing paper placemats you can doodle on, from Mulberry Paper and More.


My materials were a vintage linen napkin, wool batting,  a few old satin scraps, and backing.

Starting with a picture of a Dutch still life of flowers as a reference, I made a quick sketch, planning where I would place emphasis in the composition.
By Jean-Pierre-Xavier Bidauld (1745−1813) (Web Gallery of Art:   Image  Info about artwork) [Public domain], via Wikimedia Commons


Just the basic lines of the bouquet.

I copied that sketch with thread onto the quilt sandwich.

I wanted to be sure I liked the cutwork background before I went to the effort of painting and stitching the flowers, so I started with that.  I satin stitched lightly around fabric areas to remove, cut them out, and then satin stitched again with the wider stitch.


Some of the cutwork done, after thread sketching.

On the back of the quilt sandwich, I practiced with Derwent Inktense pencils and Jacquard textile paints. I have used both of those products before, but I wasn't getting the pale pastels I had envisioned.  The colors seemed too childish and raw.

Then I remembered that I had some acrylic inks. This article by Judy Coates Perez gave tips about the ink use.  I made a little sampler, using dip pens, brushes, and sponges, and then I used it to paint in the flowers on the mini-quilt. Coates Perez says that the ink does not stiffen fabric, and leaves a nice hand, but I found that it was almost as stiff as textile paint.  I did dilute it with water as she does, but it still left the fabric stiff enough that I was worried I would break a needle stitching through it.

I painted ink left over in my palette onto more vintage napkins, and those came in handy later.

At this point I experienced “Halfway Unhappiness,” that stage where it all looks terrible. I was not getting the faded edges I had hoped for, and I didn’t really like the colors of the ink. The pink was too salmon-colored and the forest green was too blue.  It looked like a coloring book page.
The "Yuck!" stage.  The "How on Earth am I Ever Going to Save This??!!" stage.
I really enjoyed the time I spent adding hand stitching and beads, but it didn't add the depth and subtlety I was hoping for, and with the ink-coated fabric, it was hard going.  If I had months to work on it, maybe I could get the stitching to show up the way I wanted, but the deadline was approaching. 

Judging the piece from across the room, the openwork hole on the lower left side really stuck out, too isolated and too round. I thought maybe filling it with some shape would help,  That's when I pulled out the extra painted napkins. I found random flower shapes in the paint, like looking at clouds to find pictures, and stitched the flower shapes that I noticed. I cut them out with sharp scissors. The fabric, stiffened from the ink, didn't ravel. I attached the shapes to the quilt with beads and machine stitching, floating them over the bouquet and the negative spaces.

Finally I went back with extra colored pencil and textile paint, to bring more unity to the piece.
Dutch Bouquet.
Detail, showing one of the added on pieces.

Another detail.

This piece did not meet my vision for it, and is not one of my favorites, but I do feel that I stretched my skills.  I might have been better off to limit my palette and techniques, but that is exactly why I am in in this group -- to try new things and learn what works best for me.  This was a great challenge and so much fun to work on!