Showing posts with label #artquilt. Show all posts

Wednesday, 1 November 2023

A Little Bouquet

As usual, my thoughts and ideas for this theme challenge were all over the place, but I finally settled on using this image as inspiration. 


 This is a favorite coffee shop in my city. I enjoy it for the fun latte art (the coffee itself isn't my favorite) and the lovely little floral bouquets at each table. The floral bouquet is the inspiration for my quilt, but the coffee comes into play just a bit, too. 

I decided to challenge myself to see if I could make a little floral bouquet using all circles and squares. It was quite fun, although I had to think a bit on how to incorporate squares! Here's my finished bouquet. 


The blue fabric used for the table is actually an old chambray shirt my husband used to wear. My initial idea for this challenge was to use a larger piece of that shirt and add circles and squares to it. I started by adding coffee rings and was going to stitch around them, but then the rest of that idea just wouldn't settle in. However, I thought having a table with coffee rings was a fun idea (the actual tables at the coffee shop are pristine, in case you were wondering). 


Hopefully you can see those coffee rings in that photo. From there, I built the bouquet, using only circles and squares. The vase is two squares on point, set on top of a half-circle. The bouquet itself is a mix of circles and squares - I just let my imagination run. 


The pieces are all cut freehand. They were stitched to the quilt top using raw edge nachine applique, which got a bit wonky in plaees, but worked out okay enough for me. Rather than using batting for this piece, I used fusible fleece, which I fused to the background before I added the bouquet. Once the bouquet quilting was done, I added the backing to the quilt top and finished with some free motion quilting. It didn't occur to me to do circles and squares in the free motion quilting, so I just practiced a bit of my free hand, which still needs a lot of practice! 

The backing is a scrap piece of blue from my stash, and I had to add a striped binding to add a finishing little pop to the quilt. 


This was a fun challenge for me because I had never tried that free motion quilting around circles. It was a little bit of a challenge at first, but I may have to mess with it a bit more. I always learn some new technique with each challenge. 

Wendy


Monday, 1 August 2022

Animal Kingdom: Henrietta

 When the theme Animal Kingdom was chosen, I spent days trying to figure out what to create. This happens with each theme. I think I need to do something on a grand scale - it takes me a few days to come to my senses. I considered quite a few different animals - the blue-footed booby almost won out (because they are so darn cute!). In the end, I went with a humble chicken. Ms. Henrietta, however, is anything but humble. Once I settled on this idea, I had a little fun. 


My inspiration for Henrietta is the Polish Chicken, those chickens with the crazy head floof. They bring a smile to my face whenever I see them (I think I might look a bit like that when I get up in the morning). It all began with the black and white improv. My plan was to make the head floof black and white, too, but that was not to be. In order to do that, I needed to find my Sulky Water Soluble stabilizer, which I had tucked away in a spot I was not likely to forget - heh heh. I'm still looking for it! 

The head floof (I don't know what else to call it) would have been made by using two pieces of water-soluble stabilizer, a base piece of fabric, and trimmings from cuttings. The trimmings are piled atop the base fabric, then that is sandwiched between the two pieces of water-soluble stabilizer. Then you sew it down with a thread that matches the trimmings, sewing over and over, until you feel that the trimmings are well-anchored to the base fabric. The last step is to wash off the stabilizer and let it dry. 

I used raw-edge appliqué for the entire piece, matching the thread. For the body, I stitched around the outline, then stitched vertical "feather-like" lines in the body and tail. You can't really see them that well, but here's a little peek. 


For the head floof, beak and waddle, I just did a simple outline stitch in matching thread. Henrietta has eyes under that floof, I'm pretty sure, but she didn't bother to let me fuss with them. 

Here's a photo of that floof, up close. 


She has quite the floof, doesn't she?! I told you she wasn't any ordinary chicken! Haha! The trimmings are from the cutting for my Postcards from Sweden quilt; I couldn't bear to throw the trimmings away, they were so bright and fun. Who knew that I needed to save them for Henrietta?

I pondered how to quilt her. In the end, I decided to use the same quilting idea as I did for my Sundance the Rooster quilt (I'll link all of these past quilts in my other blog post). Just simple rays behind her, to show her off a bit. I wanted to main focus to be on her. 

For the backing, I used a piece of bright blue Grunge. You can see the quilting a bit more from the back view. 


Henrietta measures 16" x 20". All of the fabrics are from my stash. This was such a fun theme, once I figured out what to make! 

Wendy

Sunday, 31 January 2021

Memories: Stitches in Time

Any needlework activity is a source of sweet memories for me.  My sewing room is a time capsule of the last century, stuffed full of things from family and friends -- pin-tucked petticoats from the early 1900s, fashion photographs from the 1920s, tatted trims and flour sacks from the 1930s, embroidered pillow cases from the 1960s -- probably a very common situation among needleworkers, but one that makes me so happy!

Inspired by the book Crazy Patchwork by Janet Haigh, (1998), I decided to combine decades' worth of textile treasures into a soft memory album.


"Stitches in Time" includes applique, yo-yos, crocheted trim, embroidery, buttons, and more.  I included the initials of my grandmother, mother, myself, and my sister.


The little piece of vintage fabric in the bottom right, was part of a whole swatch collection sent to me by Paula B., who was one of our members for a short time.

You can read more about how I made this piece here at my personal blog, Deep in the Heart of Textiles. If you click on the image there, you will also be able to see a larger version so you can see the details -- I don't know how to arrange that in Blogger!

I think I end all of my posts the same way -- "I didn't make a dent in my supplies; I loved making this piece, and I would like to do a series!" And that is true this time as well.  :)

Sunday, 1 November 2020

The Sea: Sea Spray

Since I live in Minnesota, no where near the coasts, I rarely get to see the sea. My favorite "sea" here is Lake Superior, and I go there as often as I can. I enjoy watching the waves crash over the basalt rocks, making them a deep gray. Lake Superior is a moody lake, particularly in November. My Sea Spray quilt is a nod to my favorite body of water. 


The finished quilt measures 16" x 20".  I started with a background fabric of grey ombre for the sky, blue for the water, and layered the clouds and rocks, freehand. Once I was happy with the arrangement, I stitched the clouds and rocks down by straight stitching along the curves and angles. 


With the clouds and rocks done, I got to work on the waves. I had added in two strips of blue faux cork fabric, thinking that would give the feeling of the light on the breakers as they rolled in. To soften the edges of the strips, I tried adding some sea foam by using a little free motion thread painting. I had never done this before, so it was a challenge to get it to look realistic. 


After that was done, I used white embroidery thread and began to add seed stitches to create the spray. That ended up being more work than I expected, with having to continue to add stitches to create the right combination of dense and loose stitches. 


Then I added binding, and it was done. I thoroughly enjoyed this challenge. It is one of my favorite quilts that I've made for this group! 


I have more information about the construction of this quilt on my blog today, if you are interested in reading a bit more about my process. 


Wendy


Saturday, 1 August 2020

Best Kept Secrets


My prompt from Carol for this round was the book Best Kept Secrets of Ireland which Carol bought and sent to me, but we think has been a victim of Covid post, probably sitting forgotten in a warehouse somewhere keeping its secrests all to itself. 
Scraps added improv style to just have a play and see what happens

I've been pondering and pondering the phrase best kept secrets and what kept popping into my head is Barry's tea (our national Irish drink isn't Guiness but a good strong cup of black tea with milk!).  In lieu of the book Carol prompted me to think of my favourite place.

That's a tough one.  My favourite places are where we go walking the dogs.  We have a few spots about the place.  I live in Limerick, on the Shannon so we have miles and miles of riverbank.  We are just over an hours drive to the Atlantic and have many more miles of the beach and cliff walks and my favourite beach to walk the dogs in the summer is Doughmore beach in Doonbeg or Beal Beach near Ballybunion.
Free motion quilting and fancy stitches crazy piecing style
In the end, I kept coming back to my favourite place from childhood, Curragh Chase Estate which is part of our National Forestry Service Coillte (pronounced queel-cha).  We used to cycle the 12 miles there when we were kids or be driven out for a days rambling on special occasions.  We used to use an old seat belt and swing from a huge tree, fighting for light with the biggest weeping willow I've ever seen. 

Theres a big grey granite stone house which burned down twice, a man made lake and bridges with swans, a wishing chair and a pet cemetry which I always loved. 

It was the home of the deVere family before it was handed over to the state.  Aubrey deVere was a poet and I always wonder what it must have felt like to open the door in the morning, wander down the grey steps into cultivated greenery surrounded by woodland and feel blessed to own all of that. A very different kind of life to most people.
Must have been just horrific watching the main house go up in flames.

Still, to this day, I love to walk with the dogs along the trails under the trees especially when its raining (which is quite a bit!).  You get that smell of green and feeling of dampness from the ferns and the soft rustle of the wind.   Defintely my favourite place to just be.

Cut up and moved about to fit this framing mat.  Hints of memories peeking through.

An Imaginary Voyage of Discovery in the South Pacific

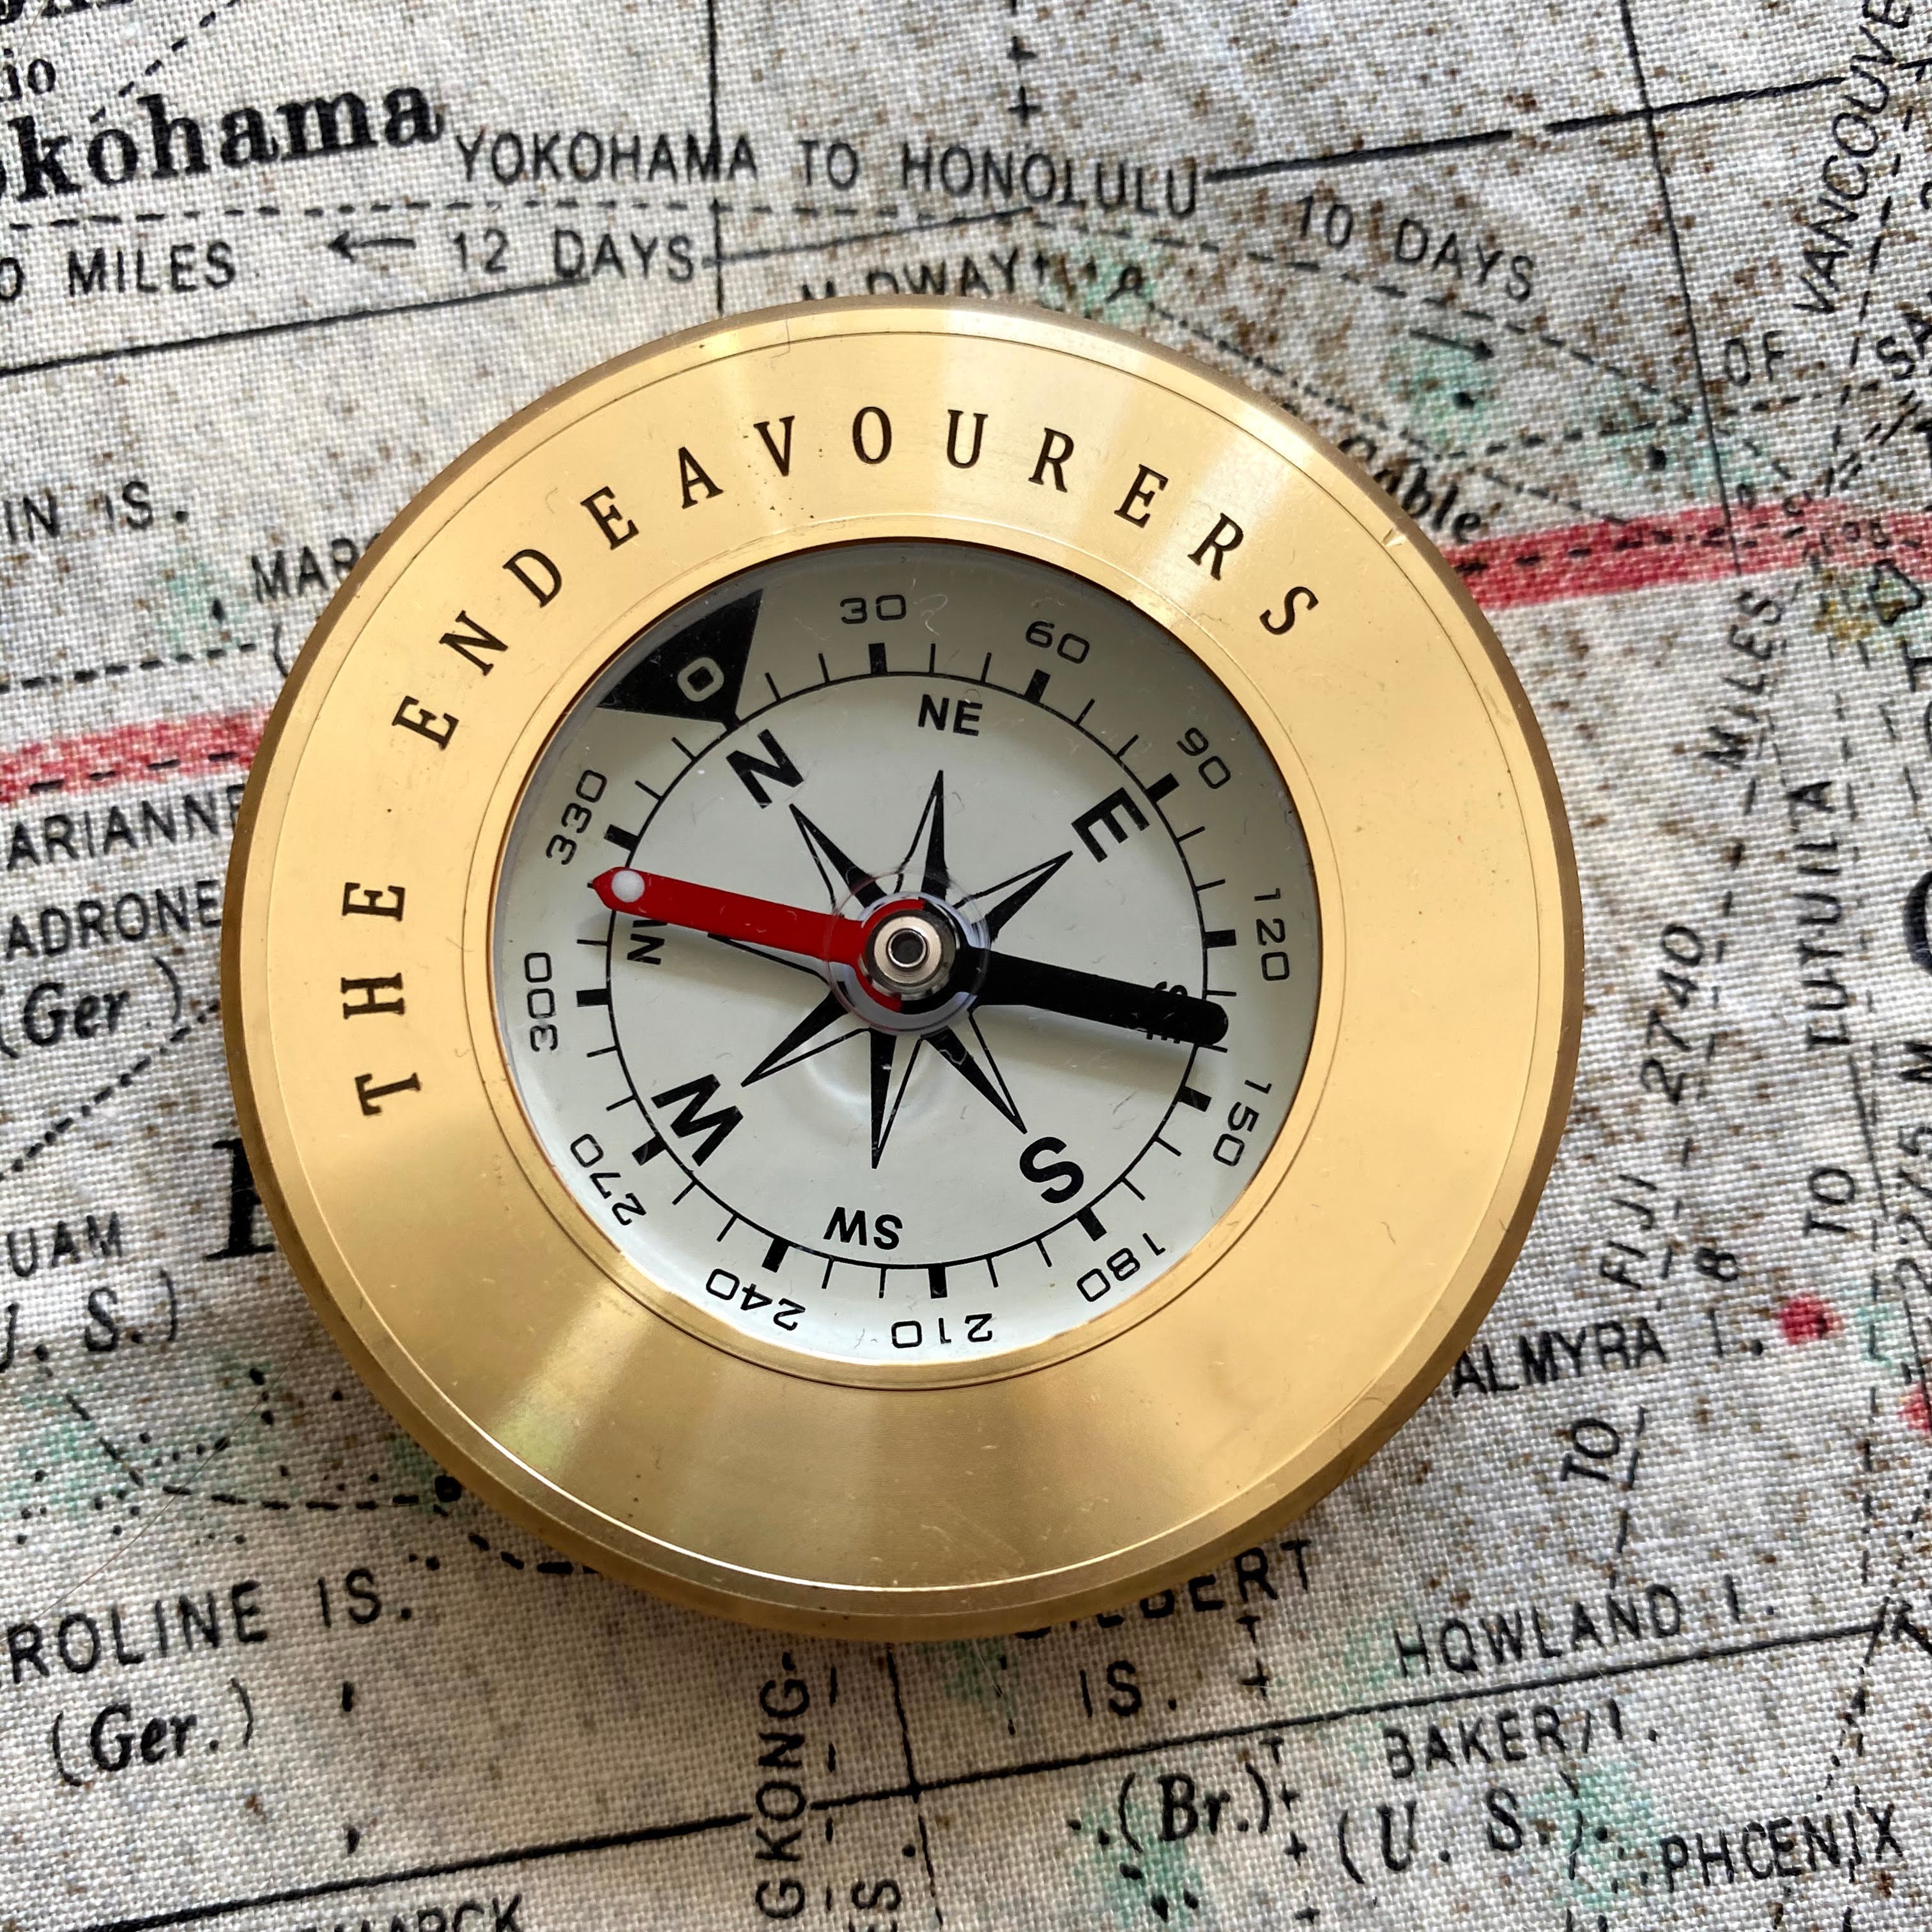
My partner, Janine, sent me this wonderful compass as my inspiration piece for this quarter's quilt.  I was quite overwhelmed to receive it.  


Knowing that all my fabric was, at the time, in my studio where I couldn't get it during lockdown Janine also very kindly and generously sent me some fabrics, including the marvellous piece of map which went into the quilt.

The compass immediately set me thinking about great endeavours.   I love the stories of Scott and Shackleton, and sea-going adventures, like Darwin's on the Beagle.   A couple of years back, we visited the Discovery in Dundee, and I was really taken with the laboratory and its portholes.  


Then, having a particular interest in plants and horticulture, I read up about some of the great plant hunters who travelled the world bringing back new (to us) species from round the world.  In my head all these things finally came together in this quilt, combining science and adventure.


The story goes...

It is sometime in the 1800s.  The occupant of this cabin, the Scientific Officer of HMS Persevere (Leith), has gone on deck to watch as the tiny South Sea island they have just visited recedes out of view as they head further south.  On his bench are some shells he picked up there, and a piece of Ipomea pes-caprae - named Goat's foot morning glory because of the shape of the leaves - which grows on beaches throughout the world.  Its seeds are dispersed in salt water.  It is not a great discovery as it is already well known but it was beautiful to see and he may paint it later - he is a competent botanical artist.  A Monarch butterfly has found its way on board and will hopefully evade the killing bottle.    The Scientific Officer has been delighted in the last month to receive a letter from his wife, enclosing a studio portrait of his three little girls who he hasn't seen for a year.  He hopes to find more letters from home next time they reach a port visited by packet ships.    He misses his family very much, but until then he will be busy examining rocks and barnacles under his travelling microscope (currently in its box away from the salt air), and writing notes for posterity about beetles of the South Pacific.

Porthole view


Monarch butterfly

A family picture


A real, and a stitched shell


I had a lot of fun making this quilt and imagining the life of its subject has been a hugely therapeutic bit of escapism. Thank you so much Janine for such a lovely prompt!

[Note: Leith is part of Edinburgh where I live, and contains a large port.  The motto of Leith is 'Persevere' - a good motto for the times!  The little Victorian girls in the photograph are actually my great grandmother and her sisters in the 1800s.  The butterfly is a tribute to my grandfather, an entomologist.  I still plan to use a picture of my other great-grandmother as a stand-in for the Scientific Officer's wife, but she is currently in a box somewhere at the back of the attic!  The woman of this era who were not fortunate enough to be adventurers themselves deserve a lot of sympathy and recognition.]

Inspired Challenge

It was challenging to figure out how to use my inspiration fabric, but in the end, I'm very happy with my two projects that came from the fabric given to me by Martha. However, I was so busy thinking and then working on the project, I forgot to take a photo of the inspiration piece before I cut it up. It is present in each project, so you still get to see it.

The fabric sent to me was a little piece of approximately 7" square of text fabric. I taped it to my wall and thought about it for awhile. To begin with, I decided to choose a phrase from the fabric and play with that a bit.

Here's the phrase I chose:


I'm not really sure why "twirling in circles" appealed to me, other than that it reminded me of a line from the movie, You've Got Mail. The scene where Meg Ryan (as Kathleen) talks about the photo of her as a little girl and her mother where they are twirling.

I thought I needed to add a little more challenge to that phrase, so I decided that all my fabric I used had to have circles in the design. The only fabric that had a polka dot design was the background fabric. The only non-circle fabric used was the inspiration fabric, which you can see here:


Of course, I had to use a circle design, so I decided on some curved piecing. I had been wanting to play with the new templates from Jen Carlton Bailly so this was a great project for some creative play. Here's a peek at my finished mini quilt:


This quilt measures 16.5" square. Here's a little closer peek at the circle fabrics:


I had fun with simple big stitching within the circles, around the edges, and then echoed the circles with some machine stitching in a soft gray that matched the background fabric.

I also added a little more stitching between the circles, for more twirling effect.


I used a gray Grunge for the backing fabric, and one of the circle fabrics for the binding.


I wasn't really satisfied that this little mini was an art quilt, and I still had some inspiration fabric left over, so I got the idea for something a little different.

I cut up some of the encouraging words and phrases from the text fabric, and made a little coneflower.


Using a piece of natural Essex linen for the background, I started by stitching the stem with 12 wt thread that matched the color in the inspiration fabric. I drew out the center of the coneflower and stitched it to the stem by machine, using raw edge applique. Then I glue basted the text pieces on separately, stitching each one down by machine, again using raw edge applique. I found a matching scrap of batik fabric that I used for the leaves and added those, using the same method.


I added a fun text fabric for the binding, and a piece of neutral fabric for the back. The quilting is simply straight lines with a matching thread color.


This little quilt is 8" x 20". Both of these little mini quilts will eventually end up on my mini quilt wall. I like them both for different reasons.

This was such a fun challenge. Thank you, Martha, for the fun inspiration fabric!

Wendy

Saturday, 1 February 2020

Dandelion Wishes

When I pondered the theme of "wishes" it reminded me of those days at the end of summer, when the heat was high, the grass was getting dry and crispy, and the sky was cloudless and blue. My friends and I would lay in the sun, pick dandelions that had lost their bloom, and blow on them to release the seeds.

I decided to try to make a quilt using that idea. Not having experimented much with mixed media and three dimensional items in a quilt, I thought I'd play a bit. My husband is the tea drinker in the family, so I decided to recycle some used tea bags. I let them dry out, then opened them and tossed the tea.

Once the tea papers were fully dry, I fan-folded them and tied them with string, making two large and two tiny pom-poms. Remember how we used to do that? It was easy to do, thanks to Wonder clips that held the fan-folded paper for me while I tied the string. I forgot to take pictures though!

Next up, was to make that clear blue sky and green grass. I did some improv work with some green scraps for the grass.


Then I attached a bright blue Moda Grunge to the green improv for the sky and added some wavy quilting to create some gentle breezes. Next up, a new thing for me - a little bit of thread painting. For someone who doesn't really free motion, I was a bit nervous, but I just had fun with it. What's to lose, right? I added two stems and two smaller ones.


Now it was time to add the dandelions. I did this by leaving long thread tails to the blossoms, then pulling each thread through to the back of the finished quilt and tying it off.


My dandelions look a bit like peonies, do they not? I even tried snipping them to create a more stringy look to the blossom, but couldn't quite get the effect. The little puffs above are the seeds that have been blown off one of the blossoms.

All in all, it was a fun experiment.


This little quilt measures approximately 15" x 18" and was made using scraps from my stash.

There are a few things I wish I would have done differently, but isn't that a bit what wishes are made of?

Thanks for the fun challenge!

Wendy